Showing posts with label no-clothes project. Show all posts

Monday, March 7, 2011

Liberty print dress.


Thanks to Bella's comment today I realised that I never blogged about finishing this dress late last year. This dress was one of the final pieces I sewed near the end of my no-clothes project.

I used the Vogue V8184 pattern:


And some Liberty of London fabric - Ceaser in dark blue:


The dress only took me half a day to make as I have sewn this pattern before.


The Liberty Tana Lawn was great to use for this dress, as the lightness of it is perfect for a summer garment. I love this pattern because it is so quick to make, and has lots of options to mix and match. Thanks Bella for asking me about it!

I've also noticed that I've reacher the 100 followers milestone... stay tuned for a giveaway soon :-)

Sam xox

Thursday, February 3, 2011

Autumn palette challenge.

Since I finished my no-clothes project at the end of 2010, I have been wanting a sewing challenge. I like the structure of a challenge, I find it helps to keep me focused. So when Colette Patterns announced the Spring Palette Challenge I knew I had to be part of it. The only hick-up is that I live on the southern side of our world, meaning we are about to head into autumn, so my palette will be somewhat less bright than those of my northerly friends.

Never the less, I have spent hours planning my palette, and this is what I have decided on...


My challenge stats:
Palette: Navy, Wine, Grey, Olive.
Number of garments: Hopefully all of them, most probably five of them.
Commitments: Blouse, Cape, 2 Dresses on the left, and the Scalloped Jacket and Skirt combo.
If things go really well: I might have all of these finished by the end of Autumn.

To see other sewers palettes, visit the forum here. If you too are interested in being part of this challenge, upload your own palette and let me know. I would love to see what you make!

Sam xox

Friday, December 31, 2010

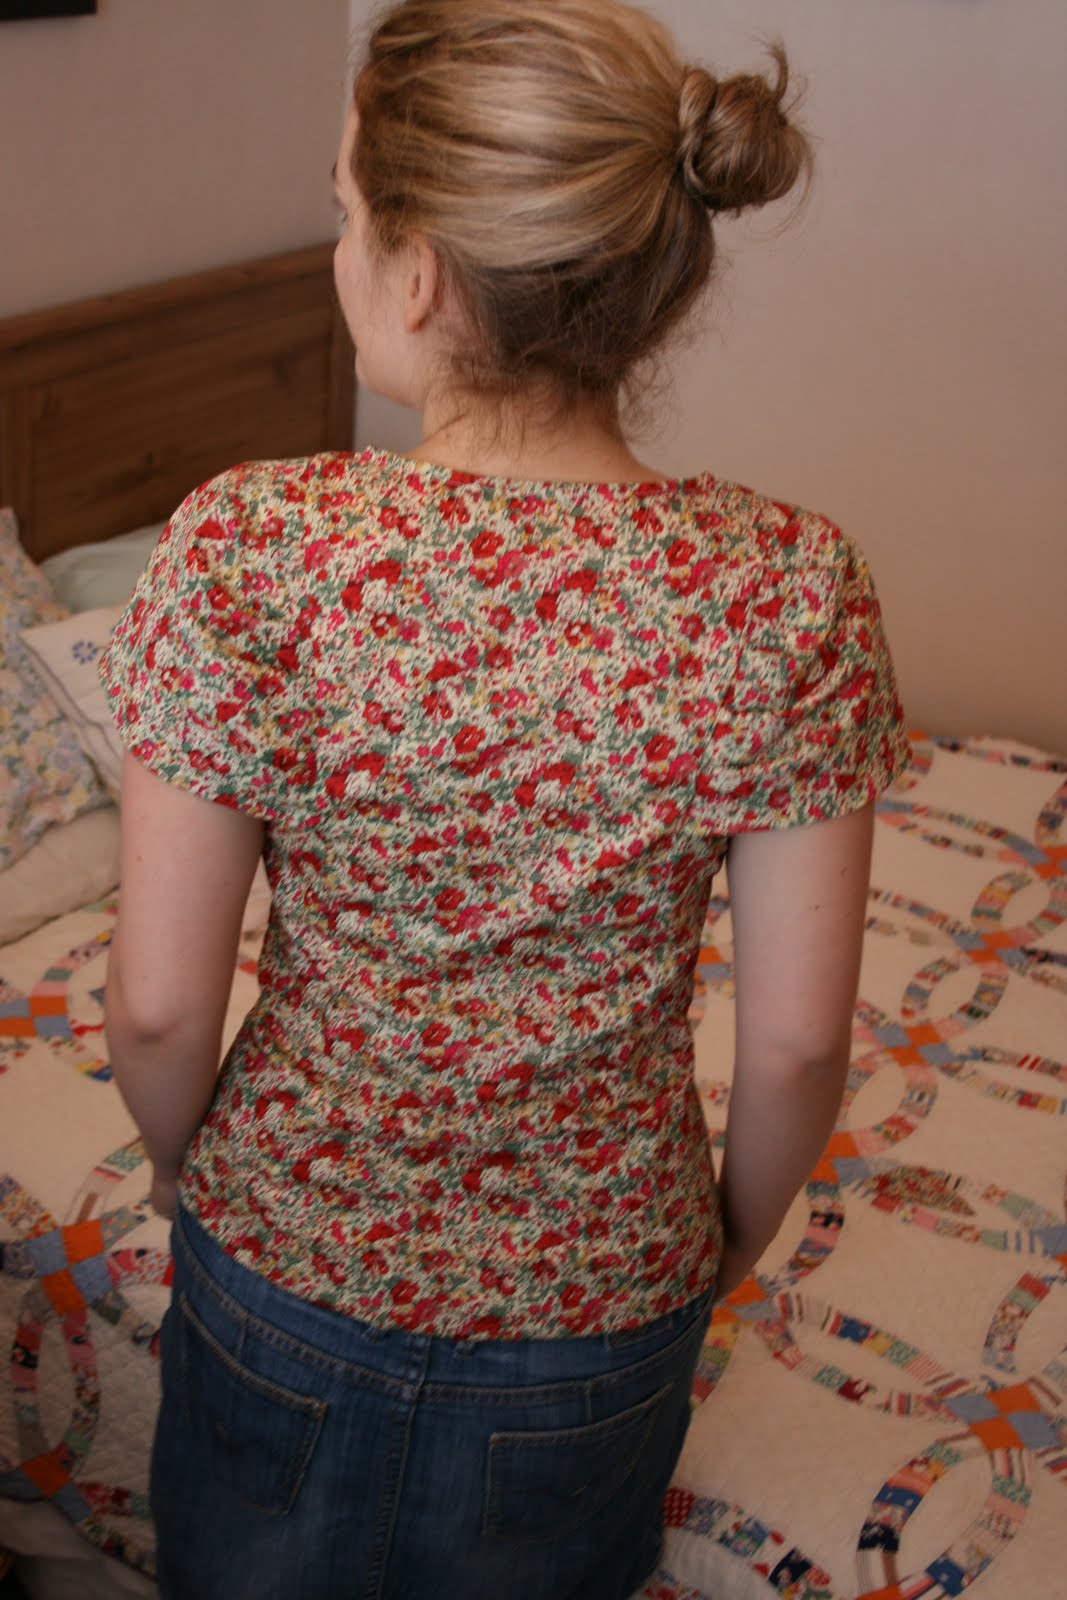
Pendrell blouse made.

I guess it is fitting that on my final day of my 'no-clothes pledge' I end it by making a blouse. Over the past 6 months I have been trying (hard) to not buy any clothes and instead sew any new clothes I want. The pledge was off to a good start until I got a full time job (yippy!), when I went back to working a 40 hour week. Less time for sewing - but also less time for shopping. So it balanced out.

This is my final piece of clothing for 2010.

The Pendrell Blouse.

Made from Tana Lawn fabric Claire Aude in red by Liberty of London.

An original design by Sewaholic.

The cute pattern. I chose View A for my first blouse.

Sewing machine I have had for 12 years.

I traced the pattern onto Swedish tracing paper.

Cutting out.

Pleated sleeve detail.

Front.

Back.

Blurry side.

More detail.

Very happy with my new blouse!

This blouse only took a couple of hours to make, and fits perfectly. Tasia designed this blouse for pear shaped women, taking into account the size difference between the bust and hips. This blouse is very easy to make as it has no buttons or zippers. I was a little skeptical about how it would fit without these fastenings but it really does slip on and off easily.

You can purchase the pattern for this blouse here. Tasia is holding a Sew-Along for this blouse on her blog beginning January 10, 2011.

Wrap up of the 6 months no-clothes project.

Wishing you all a very safe and happy new year!
Sam xox

Friday, November 26, 2010

Bike and pledge review.

It has been a good couple of months now since I made my New (financial) Year pledge and boy has my life changed! The most obvious change is that I am no longer working as a casual primary school teacher, but now full time as an outreach worker in the mental health field. I began this job at the end of July and have loved every day so far. But this post is not about how much I enjoy my job, it is about checking in to see how well I am sticking to my pledge:

Reading back over my pledge post, I can remember how depressed I was feeling about not having permanent, full time work. I am one of those people who thrive off working and contributing financially to the household. I mean, I worked 5 days a week while I studied full-time at university for four years! I love work. When I made my pledge I was trying to create a bit more of a routine and structure to my life, attempting to patch up the bad feels I had about not having a 'proper' job. Here goes:

--> I said "I will not buy a single piece of clothing for the next six months - I will have to make any clothes I want instead!" and, well, I have pretty much stuck to this, even with working full time! I do admit to buying two dresses for summer though (that was a weak moment)! I did have to buy some new clothes, but they were shorts and t-shirts for work only. That gear I do not wear on the weekends! :-) So far I have made 2 dresses, 1 scarf, 2 skirts, and one pair of pajama shorts.

--> I said "I will make more homemade foods." I tried. I did make a bit of bread. But this has definitely fallen off my radar since beginning this job... does cooking dinner count? Probably not.

--> I said "I will grow seasonal vegetables and maintain a herb garden." Well, winter was rubbish. The spot I dug my vegetable garden just didn't get enough sunlight, so I had severely stunted crops. I have re-planted for spring and it is looking much more promising. The days are getting longer and the crops seem to be growing much faster.

--> I said "I want to establish more environmentally friendly cleaning methods.". This definitely has not happened I am afraid! Sorry guys (and Earth)!

---> I said "I want to start an exercise routine." I have done this! A week after I began my job a gym opened up downstairs from my office (what are the chances). So there really was no excuse. I am currently doing 2 spin classes per week and it is actually making me feel good! (I know, exercise really does work, strange huh)!

--> I said "In an effort to live greener I am considering riding a bike to work" I found out this week that there is a spot in the office where I can leave my bike if I ride to work! So what's a girl to do when she uncovers such information? Buy a bike of course! Look at my new baby...


Jamie picks it up for me on Tuesday, so come Wednesday I will be riding to work! I am planning to add a basket to the front and a bag on the back, plus some fenders and lights.

* * * * * * *

So overall I think my New (financial) Year pledge is going pretty well. I have definitely stuck to most of it, and it is becoming a nice part of the routine of my life.

I am now beginning to plan my goals for the coming New Year... just over a month to go.

Sam xox

Thursday, November 4, 2010

Sew and save.


I found this little gem tucked away in a book shop in Sydney. It is a reproduction of the original "Sew and Save"published in England in 1941. Written during war-time, this book promises to help its reader to:
* Transform old clothes into new with simple adjustments.
* Plan a family's wardrobe using a four year program.
* Make children's clothes from tired adult garments.

Written during a time when rations and coupons were all people lived off, this little book is a poignant reminder of what dressmaker of days gone by have lived through, an important reminder for those of us who sew clothes in the twenty-first century!

It really makes me appreciate that clothing is so readily available these days, and I am choosing dressmaking out of interest, a creative outlet, and stress management. These women had to rely on their dressmaking skills to clothes themselves and their families for the cold British winters, making do with whatever materials they could lay their hands on. It is quite honestly hard for me to put imagine myself in these women's shoes, when I live a comfortable life and have much (too much) choice in fabrics, trimmings, patterns, etc. Makes me very grateful indeed.


The book has a chapter on making undergarments, and gives detailed instructions on how to draft a pattern for and then sew together a brassier. I am seriously keen to give this a try, however, please do not expect to see photographs on here of me modelling my undergarments! hah- although I could always put it on Cindy my dressmaking mannequin, she never wears clothes.

This book truly has some timeless advice inside its pages, however, I think the page on knitted underwear really could have stayed in the 1940's... itchy!

Sam xox

Sunday, October 24, 2010

Craft day.

Craft day is a new concept for Mill and I. For years we have had Craft Nights; a weekly routine during which we would do craft, share a meal, and debrief about what had happened during the week. As our lives changed, our weekly routines began to become tricky to craft around, and we were finding that weeks were going past with no craft nights happening.

Mill and I are similar souls, in that we enjoy the stress relief doing craft gives us as well as having an end product. We call craft our 'therapy'. I am sure most people who do some form of craft would agree with us!

On Saturday Mill and I got together for our second craft day. An eight hour session of crafty goodness.


Mill's craft this month was to make an apron based on one that she gave me last year for my birthday. Mill had been looking at similar aprons at some Sydney markets but the store holders were charging $50 for them. Mill was convinced she could make the same thing for much less money, and she was right!

Below is the apron Mill gave me, a simple apron involving two different fabrics, a pocket, some gathering and a waistband.


Mill purchased some cute strawberry print fabric and a complimentary red and white spotted print. The grand total for Mills apron was less than $12! After a few hours spent at the sewing machine, this is what she made...


How clever is she?!? I will type up some instructions for how to make this apron sometime this week. I am so inspired by this creation, I can't help but want to make one for myself!

I worked on making a dress out of the Liberty fabric that arrived last week. I was well on my way to finishing it on Saturday, but after sewing in the zipper I realised that I had chosen a colour of zipper that was not quite right. After a bit of hesitation and consultation with Mill and Michelle, I decided to unpick the zipper and end my sewing for the day.

Today I went and purchased a nicer coloured zipper and spent an hour this evening working on the dress. It is not completely finished, and it is now dark so any pictures I tried to take of it looked terrible, but it wouldn't be fair if I left you with nothing, so here is a (terrible quality) sneak peak.


Mill and I are now committed to having Craft Day every month. It is so much better sewing in the daytime; sunlight is so much better to work in and we are not as tired as we are during the week. Plus we get in a good eight hours of craft in one session, which means we get more done as it cuts down the set up/pack up time.

Sam xox

Friday, October 22, 2010

Talea jacket.

Many people have been telling me that I simply have to visit The Remnant Warehouse. It all started a few years ago when my friend and her boy used to shop there for fabric to have clothing tailored for them (so fancy!). More recently at the quilting group I would admire members fabrics only to be repeatedly told that they were purchased from The Remnant Warehouse. It was only going to be a matter of time. On Saturday I dragged Jamie to Alexandria to check this place out for myself.

Words can't describe what greeted me when I walked into the store. I felt like I had walked into some kind of sewers utopia. Walls of quilting fabric. Piles of dressmaking fabric. And hundreds of embellishments, supplies and tools. I didn't know where to start.

Jamie reminded me of the purpose of our trip:
1) Buy fabric for a jacket.
2) Buy cheap calico for practicing patterns.
3) Linen for his mum.

There was a large table to the left of the door as you walked inside the shop. On it (and under it) were piles of folded and discounted off-cuts of dressmaking fabric. I searched the pile to find something to make a jacket with and came across a hounds tooth print fabric that I thought would be perfect to make a coat from. It is a wool blend, so not the expensive stuff, but I thought it would be perfect for my first coat project. And seeing as it is only Spring time here, there will be no pressure of time to rush this project.


Here is a picture of the coat I want to make, but with a few minor changes to the pattern. The pattern Talea and is a Burda Style pattern. If you like it, you can download yourself a copy of the pattern free from here.
9301_talea_tech_dwgs_large
Now I just have to find the perfect lining fabric...


All of these fabrics available at Shaukat.

Too many choices. I think I may need to make more than one coat. But first I need to learn how to line a garment!

Sam xox

Tuesday, October 19, 2010

Burda Style printable patterns - how they work.

I have been purchasing and printing a number of Burda Style patterns recently, and find that I am really enjoying the hassle buying these PDF patterns online takes out of dressmaking. You see, in the past I have driven over half an hour to the large homemaker stores, only to spend another few hours looking through their monstrous pattern books trying to find 'the perfect pattern'. Guaranteed, I then either end up purchasing a pattern that looks the closest to what I had in mind (a purchase I later regret), or I go home empty handed and disappointed (aww).

Three of my favourites at the moment...

The range of patterns offered in our Sydney stores leave a lot to be desired. Most are very dated and cost $15 or more to buy. Here's where Burda Style comes in. Their patterns are current styles costing between free and $7 (the highest I have seen on the website, but there might be higher ones). Most are graded patterns and their size ranges are really generous. To get the free patterns all you need to do is sign up for a free account and log in. For patterns that have a cost, you simply pay for them securely through paypal and then you can download them and save them onto your computer or USB stick.

What I also like about this form of pattern purchase is you can save the PDF files to your computer, but you can also access them online - which comes in handy for me when I am sewing at my Mums place!

If you are as much of a neat freak as I am, you will also like the fact that if you cut your pattern to a certain size, but then need a different size down the track, you can print yourself another one.

Printed pattern ready to be taped together...

Once you have downloaded the PDF, you simply print the instructions and pattern and then spend a small amount of time gluing or taping the pages together following the number/letter coordinates (warning, some patterns are 25+ pages so have lots of paper handy and print in a low resolution setting on your printer).

A skirt pattern ready for cutting out...

Cut your newly made pattern out with scissors (not your dressmaking ones of course!) and there you have it - a sewing pattern!

And there you have it, a skirt pattern ready for use!

Some things to be aware of though:

There are two main types of pattern on the website: BurdaStyle.com & Burda Style Magazine. The main differences between the two are that the Burda Style Magazine patterns do not include seam allowance in the patterns and also have strict copyright laws. See here for more information.

Happy sewing!

Sam xox

Sunday, October 10, 2010

Jacket with standing collar.

I have been wanting to make a waist length jacket for a while now. In my wardrobe I have three trench coat sized jackets and a couple of cardigans. I need something in between to get me through the changing season. Burda Style have released their latest magazine patterns online and I have fallen in love with the blue jacket on the bottom right.

Image borrowed from BurdaStlye.com here.

We are going into Spring at the moment here in Sydney so I would have to pick the jacket fabric carefully... I think a trip to Tessuti Fabrics is in order!

Sam xox

Tuesday, October 5, 2010

Dante shorts.

I caved...

The baby shorts I made (as a gift) were just too cute, I couldn't resist making a pair of my very own!

I used a Kwik Sew pattern (number 2388) I purchased a while ago with the intention of making some pajama's for Jamie.


I made a few alterations to the boxer shorts pattern, and with the help of my sewing machine and overlocker (serger) came up with these.


Made from 'Dante' by Liberty of London. Fabric purchased on eBay UK.

Sam xox

Baby shorts.

My manager at work goes on maternity leave this week, so I thought I would have a go at making her a pair of little shorts for her soon-to-arrive baby girl. I found the pattern on Nicolle's Originals blog (has lots of original ideas for kiddies things and patterns) and the shorts pattern was free to download .

I made the shorts from some fabric I bought of eBay a while back, and I think they turned out super cute!


Kudos needs to go out to my dear sister-in-law too as I used her idea of sewing the label on the outside of the shorts instead of the inside.

If you would love a pair of shorts similar to these, but do not have the time to make them yourself, then check out Ally's Etsy shop MavisandFrank and see her cute range of original design baby shorts made from Liberty of London fabrics (psst Ally also does custom orders if you have any special requests!).

Sam xox

Tuesday, September 21, 2010

Sidonie skirt.

I purchased this fabric over a year ago now, for no other reason than just loving the colour and pattern. After 12 months of sitting in a drawer, I finally decided to make a skirt from it. However, only having 1 meter of the fabric seriously restricted what could be done with it. I searched through the Burda Style website and came across the Sidonie Skirt pattern.

With a few alterations to the original pattern, I was able to make a cute skirt with only 1 meter of fabric. The main difference is that I shortened pattern pieces 1 and 2 by about 2 inches at the shortening line, then cut the pattern one size too big. I then shaped it slightly so that the skirt sat nicely on my hips rather than on my waist (which compensated for the shortened pattern length). I did not cut the pattern on the bias either, like the instructions told me to, rather the way I cut it means that the straight grain line is running vertically through the skirt. This does not seem to make any difference to the wear. The best part of all? The Sidonie skirt pattern only cost $3 to download and took less that 1 hour to make!


Front view of the skirt.


Invisible zipper and hook and eye.


A peak inside the skirt so you can see the stitching.


A not-so-clear photo of the skirt on. When the weather is
nicer I will take a better one I promise!


Overall I am really pleased with how easy this skirt was to make, how quick it was, and how well the pattern works with 100% cotton fabrics. I think this style of skirt is quite flattering and looks good with a t-shirt or singlet top. I can see myself whipping up a few more of these before the summer is out!

Sam xox